Phase 1: Prepare Reports for Printing
Go to Sentral -> Reports (… preferably use Google Chrome)
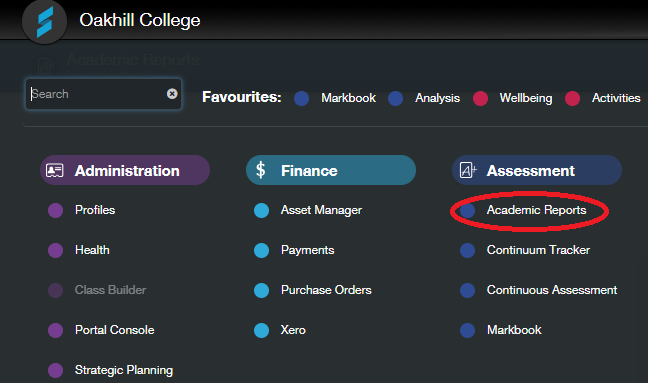
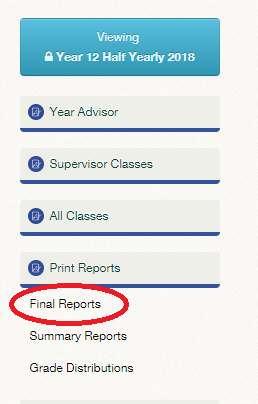
In the left pane, click Print Reports -> Final Reports
Complete the steps below for preparing the report for printing:
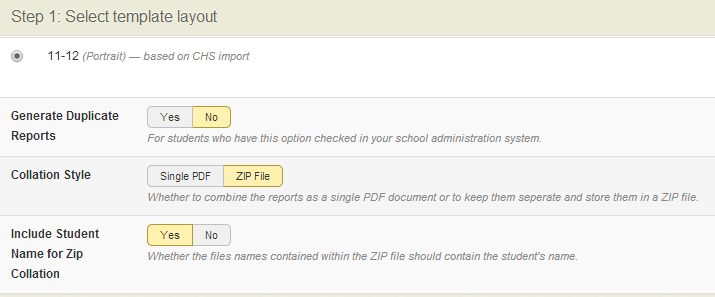
Step 1: Template Layout
Ensure the settings below are chosen (the ones highlighted in yellow) :
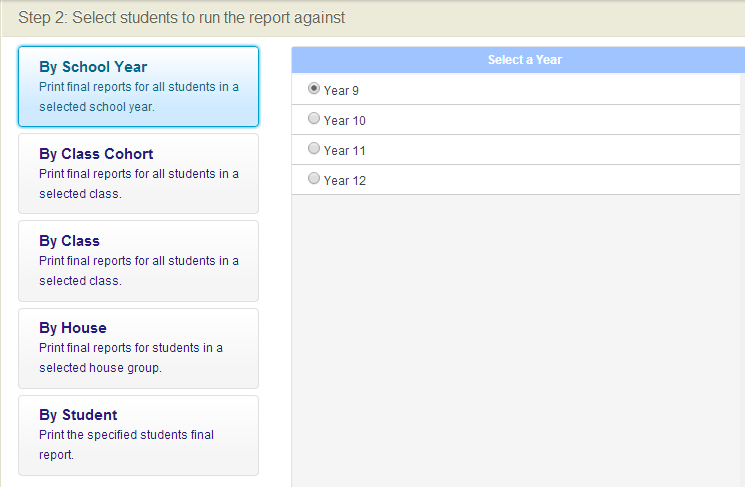
Step 2: Select the students to run the report against
Choose students according to their Year Group (Year 9, 10, 11 or 12) and according to category (by School Year, by Class Cohort, by Class, by House, by Student … normally, it will be by House).
Step 3: Generate the report
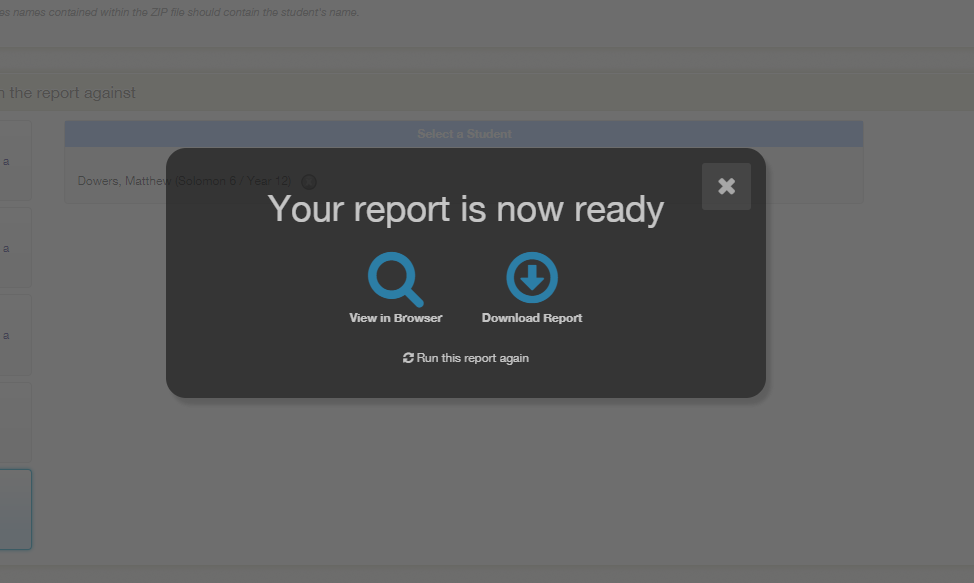
Click the ‘Generate Reports’ button at the bottom of the screen … and then wait patiently for the reports to be generated (it can take up to 10 minutes!) A window saying ‘Please wait while the report is created’ will appear to assure you that something is happening.

When completed, a window will pop-up saying ‘Report Created’ and giving you the option to show the report in your browser or saving it to the desktop. If you have chosen ‘zip file’ in Step 1, simply ignore these options and click the ‘X’ at the right-hand corner of the window to click it off.
Phase 2: Do the Physical Printing
First, unzip the zipped file
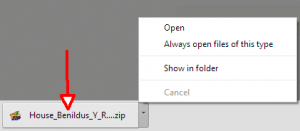
- At the bottom left of the Chrome browser window you will see the name of the zip file which was created in Step 3 above.
- Click on the down arrow and then select ‘Show in folder’
- The actual location on your hard disc is C:\Users\<your login name>\Downloads
- Double-click on the zip file to unzip it
- You will see an ‘Extract’ button when you double-click the zipped file.
- Click on ‘Extract’ and proceed to unzipping it; accept all the defaults (your unzipped files will now be found in a folder with the same name as the zipped file).

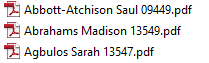
- The actual reports are inside this folder.
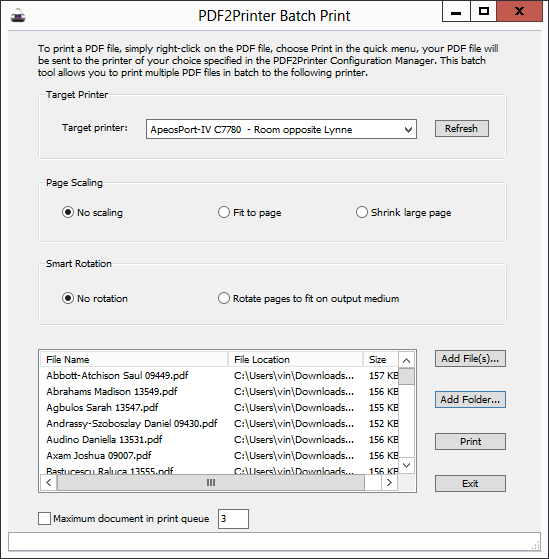
- Second, auto-print all of the reports in the unzipped folder using PDf2PrinterBatchPrint


To automatically print the reports contained in the unzipped folder you will have to use the batch-printing program called PDf2PrinterBatchPrint.
- Double-click the desktop shortcut to open Pdf2PrinterBatchPrint
- For Target printer, select “ApeosPort-IV C7780 – Room opposite Lynne”
- For ‘Page Scaling’, select ‘No scaling’
- For ‘Smart rotation’ select ‘No rotation’ (see screenshot on next page)
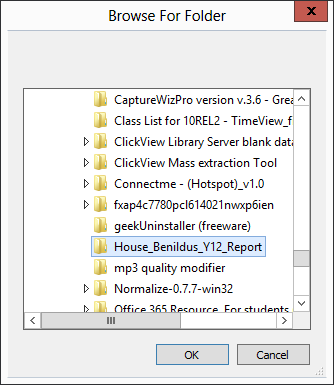
- Click ‘Add folder’ and navigate to the location of the unzipped folder that was created earlier.
- Click on the folder and then click ‘OK’ the folder to add it
The reports should now display in PDf2PrinterBatchPrint.
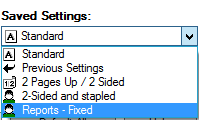
- Ensure that the property for ‘Saved Settings’ in the Xerox AspeosPort Printer is set to ‘Reports’
- Click ‘Print’ on PDf2PrintBatchPrint to send the job to the Xerox printer.
Should you have any issues with this, please email the ICT Helpdesk by using the following link: Email the Helpdesk