1. Sentral – How to Send Emails to students (and other members of the school)
2. Login to Sentral
3. Click Sentral -> Messaging
4. Click on the ‘Messaging’ icon

5. In the left pane, click to expand Send Messages’ and then click Send SMS & Email
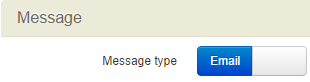
6. For email, ensure that ‘Email’ is selected for the ‘Message Type’ (clicking on the ‘Message Type’ button will toggle the selection between email and SMS)
7. If the ‘From’ box is showing reception@oakhill.nsw.edu.au click on the box next to it to change the sender from ‘School Email’ to ‘My Email Address’ (your school email address should now be showing instead of the default reception@oakhill .nsw.edu.au address) … as shown below:
Default sender:

Sender after you click on ‘School Email’ and change to ‘My Email Address’

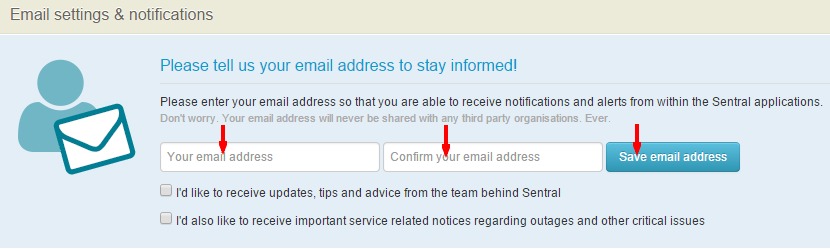
Note: instead of the ‘School Email‘/’My Email Address‘ buttons you may get the notification shown below (‘Information: Your personal email isn’t set to send from your personal email please set it here‘.

If that’s the case, then click the blue link that says ‘here‘ and enter your email address, confirm it and then click on the ‘Save eamial address button’ as shown below.
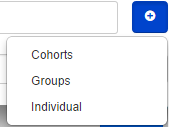
8. Click the blue ‘+’ box on the far-right of the ‘To’ box.
![]()
You can now choose recipients according to whether they are an individual, a group or a cohort.
Cohort choices are as shown here:
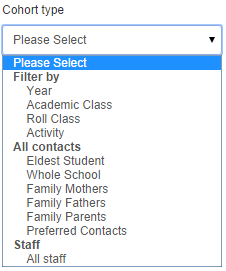
The ones you would most commonly use for sending emails to students are: Academic Class (your teaching class), Roll Class (your HomeRoom Roll class) and Year (an entire Year group)
Groups are for specific interest groups which have been previously set up (this option is not relevant for emailing students) .
Individual (s). Allows you to choose one or many recipients on an individual basis. Use the ‘Search’ feature (top-right of window) to make it easier to find the persons to whom you want to send the email.
9. In the subject box, enter a subject heading for your message

10. Write the text of your message in the text box
11. Browse and add any attachments by clicking on the ‘Attach’ button (top far-right of text box)

12 Click the ‘Send” button (bottom-right of Messaging window)
